What Soil to Use for Grading Around House
Proper soil grading around a house is one of the most crucial steps in protecting your home from water damage, foundation issues, and landscaping problems. Homeowners often overlook this detail, but choosing the right soil and implementing correct grading techniques can save thousands in repairs and ensure your property remains safe and aesthetically pleasing.
In this guide, we’ll answer the key question: what soil to use for grading around house, provide an expert step-by-step guide, compare different soil options, and cover common mistakes and FAQs for homeowners who want lasting results.
Short Answer – The Best Soil for Grading Around a House
The ideal soil for grading around a house is well-draining, compactable soil with minimal organic matter, typically sandy clay or gravelly loam. This type of soil efficiently directs water away from your foundation, prevents settling, and reduces the risk of erosion, all while providing a stable base for landscaping.
Why Soil Choice Matters for House Grading
Soil selection is not just a landscaping concern—it directly affects the structural safety of your home:
Prevents water damage to the foundation: Improper soil can trap water, leading to cracks and weakening the base of your house.
Reduces basement flooding: Correctly graded soil ensures rainwater flows away, protecting basements from leaks and mold.
Supports landscaping durability: Stable, well-draining soil keeps plants healthy and prevents washouts on slopes and flowerbeds.

What Is Grading and Why It’s Important
Grading refers to shaping the soil around your home to create a gentle slope away from the foundation, allowing water to flow naturally toward drains or lower ground. Proper grading is a key defensive measure against structural damage caused by moisture infiltration.
Without proper grading, even minor rainfall can accumulate near the foundation, causing:
Foundation cracks
Basement leaks and flooding
Soil erosion around your property
How Soil Type Impacts Grading Effectiveness
Not all soils behave the same. The type of soil you use significantly impacts how well your grading functions:
Clay soil: Highly compactable, but retains water and can crack in dry conditions.
Sandy soil: Excellent drainage but may require stabilization to prevent shifting.
Loam: Balanced texture, offering moderate drainage and compaction.
Gravelly or engineered soil: High stability and drainage but more expensive.
The soil’s interaction with rainfall and irrigation directly affects how water moves away from your home, making soil choice critical.
Types of Soil Suitable for Grading Around Houses
Sandy Soil
Benefits: Drains quickly, easy to compact.
Drawbacks: Can erode or shift; may require a stabilizing mix for long-term durability.
Best Use: Gentle to moderate slopes where fast water drainage is needed.
Clay Soil
Benefits: Dense, compactable, and stable once set.
Drawbacks: Poor drainage, prone to cracking during dry periods.
Best Use: Flat areas or where slow water movement is acceptable.
Loamy Soil
Benefits: Balanced drainage and compaction, ideal for most residential grading needs.
Drawbacks: Requires proper testing to ensure correct proportions of sand, silt, and clay.
Best Use: Gentle slopes with landscaping or garden beds.
Gravelly or Engineered Fill
Benefits: Excellent drainage, ultimate stability, and prevents long-term settling.
Drawbacks: High cost and professional installation often required.
Best Use: Areas with heavy rainfall or steep slopes where water management is critical.
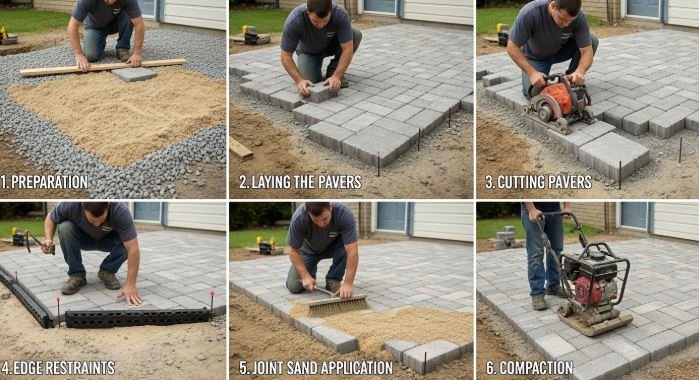
How to Grade Soil Around Your House
Step 1 – Assess Current Soil and Slope
Before adding soil, examine your existing ground:
Test soil type using simple hand methods or a soil probe.
Determine the slope. A safe guideline is 6 inches of drop per 10 feet away from the house.
Step 2 – Choose the Right Soil
Select soil based on your slope, climate, and drainage needs:
Sandy clay for general use
Loam for garden-friendly slopes
Gravelly fill for heavy rainfall areas
Step 3 – Prepare the Area
Clear debris, vegetation, and old topsoil.
Level uneven areas to create a stable foundation for grading.
Step 4 – Apply Soil in Layers
Apply soil in 2–4 inch layers, compacting each layer thoroughly.
Avoid dumping large amounts at once to prevent uneven settling.
Step 5 – Compact and Shape the Soil
Use a hand tamper or plate compactor for small to medium areas.
Shape the soil to maintain a continuous slope away from the foundation.
Step 6 – Verify Grading and Drainage
Test drainage by running a hose and observing water flow.
Adjust slope where pooling occurs.
Step 7 – Finish With Landscaping or Mulch
Apply mulch or plant erosion-resistant ground cover.
Ensure soil stays in place during heavy rain.
Best Soil Options for House Grading
Soil Type Drainage Compaction Cost Ideal Use Case Pros Cons Sandy Soil Excellent Moderate Low Sloped areas Quick drainage Needs stabilization Clay Soil Poor Excellent Low Flat areas Durable when compacted Can crack, poor drainage Loamy Soil Good Good Medium Gentle slopes Balanced Requires testing Gravelly Fill Excellent Excellent High Heavy rainfall areas Highly stable Expensive, professional install
Common Mistakes to Avoid When Grading Soil Around a House
Overusing clay without proper drainage solutions
Failing to compact soil, leading to future settling
Ignoring natural water flow patterns on your property
Skipping slope verification and water testing
Avoiding these mistakes ensures your grading lasts for years and protects your home effectively.
FAQs About Soil for Grading Around Houses
1. What soil is best for preventing foundation damage?
Sandy clay or gravelly loam is ideal as it drains well and compacts firmly, keeping water away from your foundation.
2. Can I use topsoil for grading around a house?
Topsoil alone is not recommended because it contains high organic matter and may settle or wash away.
3. How deep should the grading soil layer be?
Typically, 6–12 inches of grading soil is sufficient, depending on slope and soil type.
4. Is clay soil always bad for grading?
Not always. Clay can be effective for flat areas but must be amended or mixed for slopes to prevent water retention.
5. How do I fix uneven grading after heavy rain?
Add soil in low areas, compact, and reshape the slope to maintain proper drainage.
6. Can I mix sand and clay for grading soil?
Yes, mixing sandy and clay soil can create a stable, well-draining base suitable for most yards.
7. Do I need professional equipment to compact grading soil?
For large areas or engineered fills, yes. Small yards can often be compacted with a hand tamper.
8. How long does it take for soil grading to settle?
Expect minor settling over a few months. Proper compaction minimizes this risk.
Conclusion – Choosing the Right Soil for Safe, Effective House Grading
Proper soil selection and grading are essential to protect your home from water damage and foundation issues. Sandy clay, loamy soil, and gravelly engineered fill are the most effective options depending on your landscape and climate, and they also provide a stable, well-draining base for patio paver installation, ensuring your pavers remain level, durable, and long-lasting.
Remember:
Maintain a slope of 6 inches per 10 feet away from the house
Compact each soil layer carefully
Always verify drainage after installation
By following these steps, you’ll ensure a durable, safe, and well-drained yard that supports both your home and landscaping.